How to organize iPhone photos one month at a time
xStudio · Checked November 5, 2026 with xPhotos 1.12.0
Pick a month you remember, perhaps the month of your last trip. Go through its photos once. Keep the ones you like and anything you are unsure about. Set aside only the shots you know you can let go, then review that list before deleting.
Find the month in Apple Photos
In Photos on iOS 27, swipe down on the library grid and tap Months. Look for an event you recognize to find the dates. Months is a curated view and can leave out similar shots, screenshots and receipts. Switch to All to see every item around those dates. If you only need to remove a few old screenshots, you can select and delete them right there.
Apple iPhone User Guide: Find photos by dateWork through the month in xPhotos
1. Open a month card
Open the organizing tab in xPhotos. Find the year and tap the cover of the month you want to review. A month with fewer photos makes a good first session. Monthly organizing uses a free allowance. Once you use it up, opening a month brings up the membership screen.
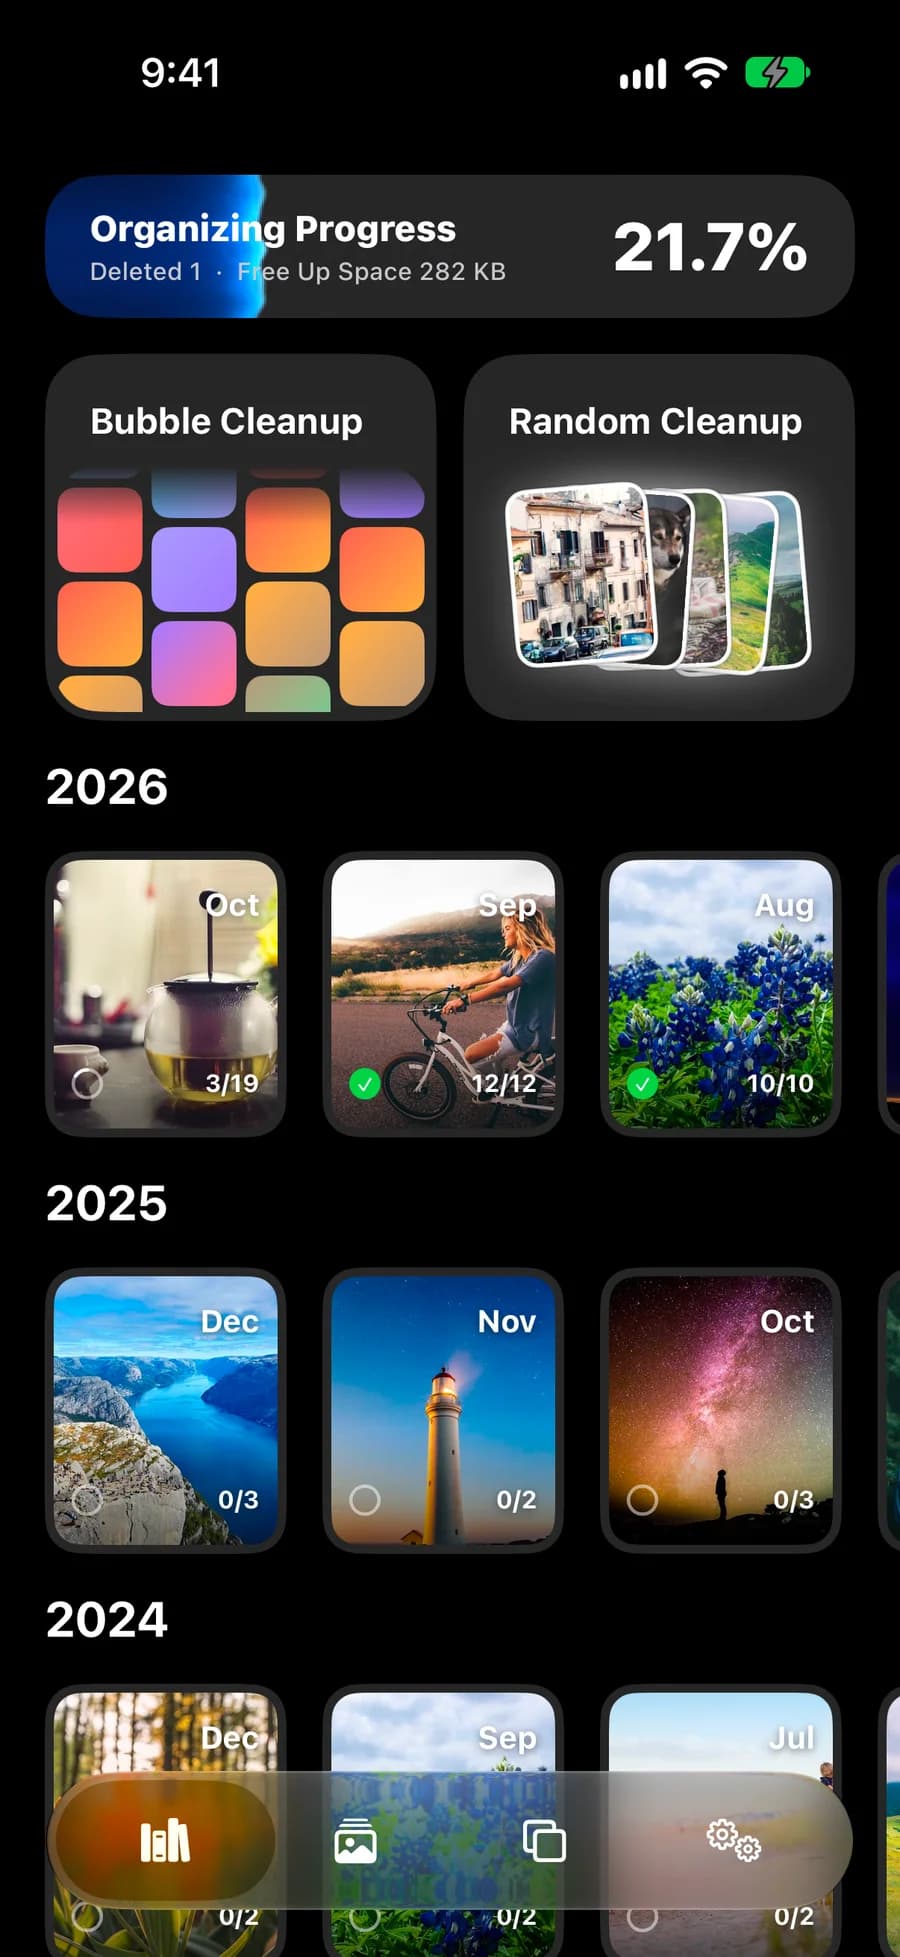
The fraction on each month card shows how many items you have reviewed out of the total. 2. Use the right arrow to keep a photo
Tap the right arrow at the bottom to keep the photo and move on. For an accidental shot or a receipt you no longer need, swipe up on the photo or tap the trash icon. This adds it to your pending list and advances to the next photo. If you cannot choose between two shots, keep both for now.
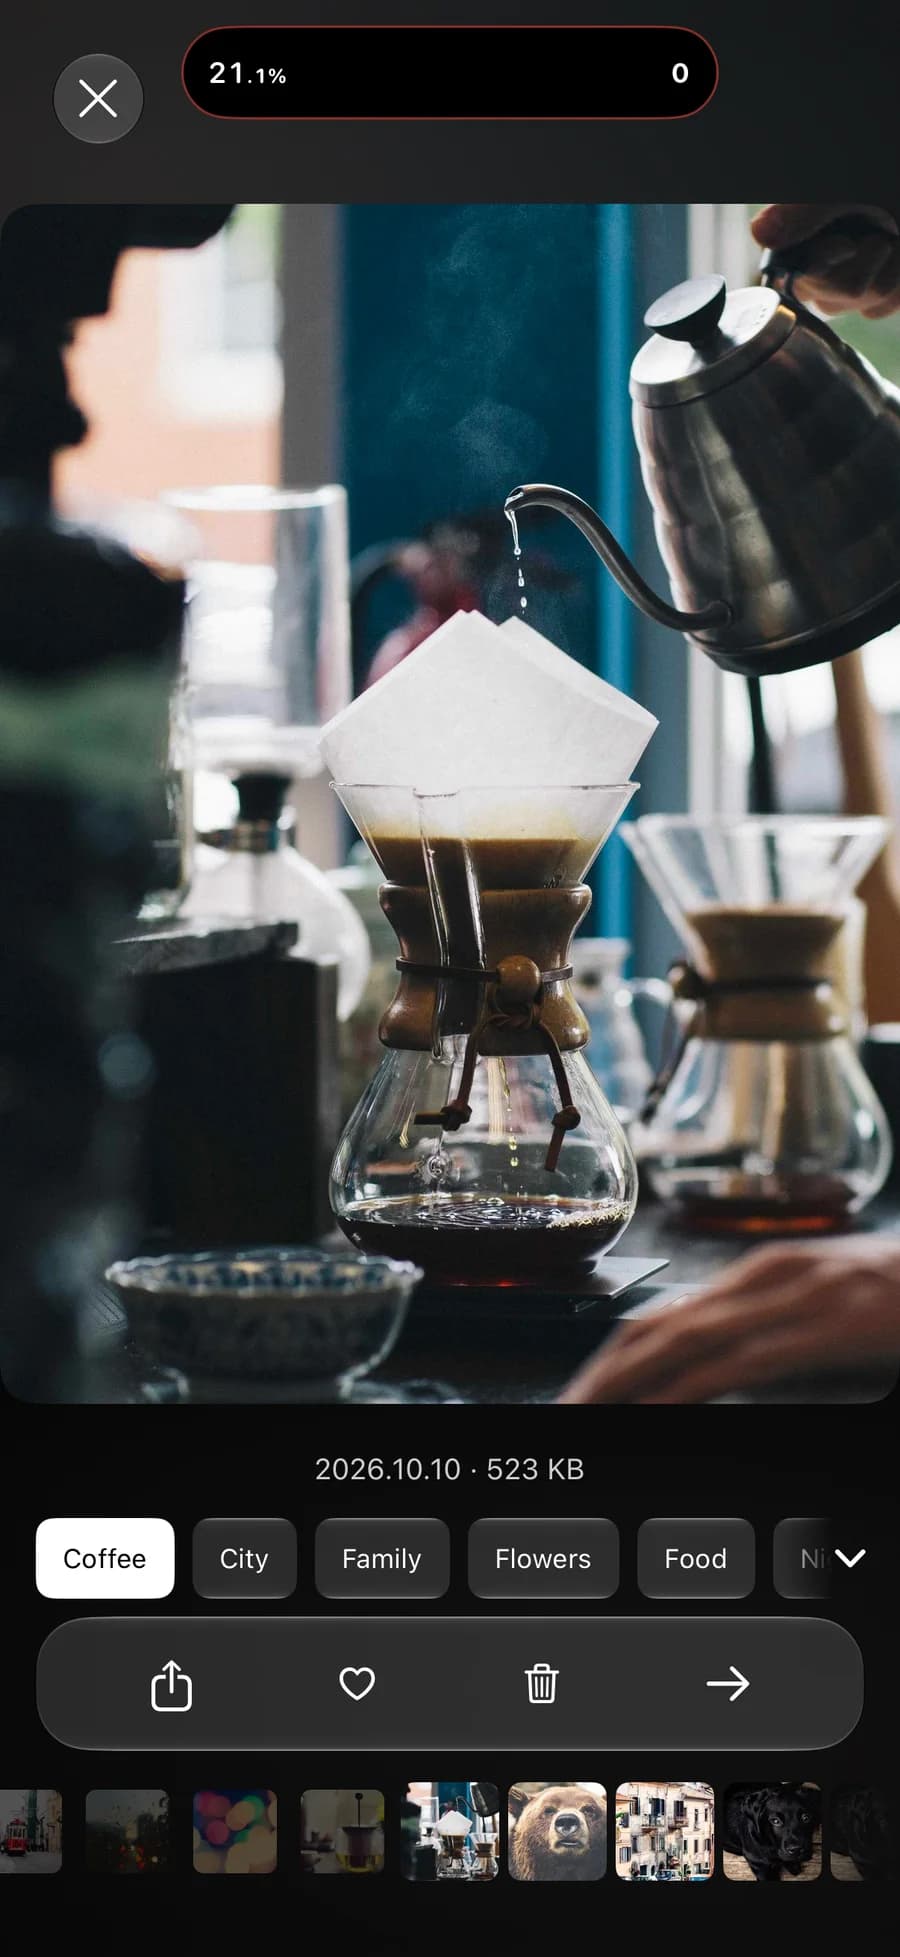
The arrow advances without queuing the photo. The trash icon beside it adds the photo to your list. 3. Check the list before you delete
Tap the pending count at the top of the screen to open the list. To keep a photo, tap the × in the top-right corner of its thumbnail. Check the remaining count, tap the red delete button at the bottom, then confirm in the iOS dialog.
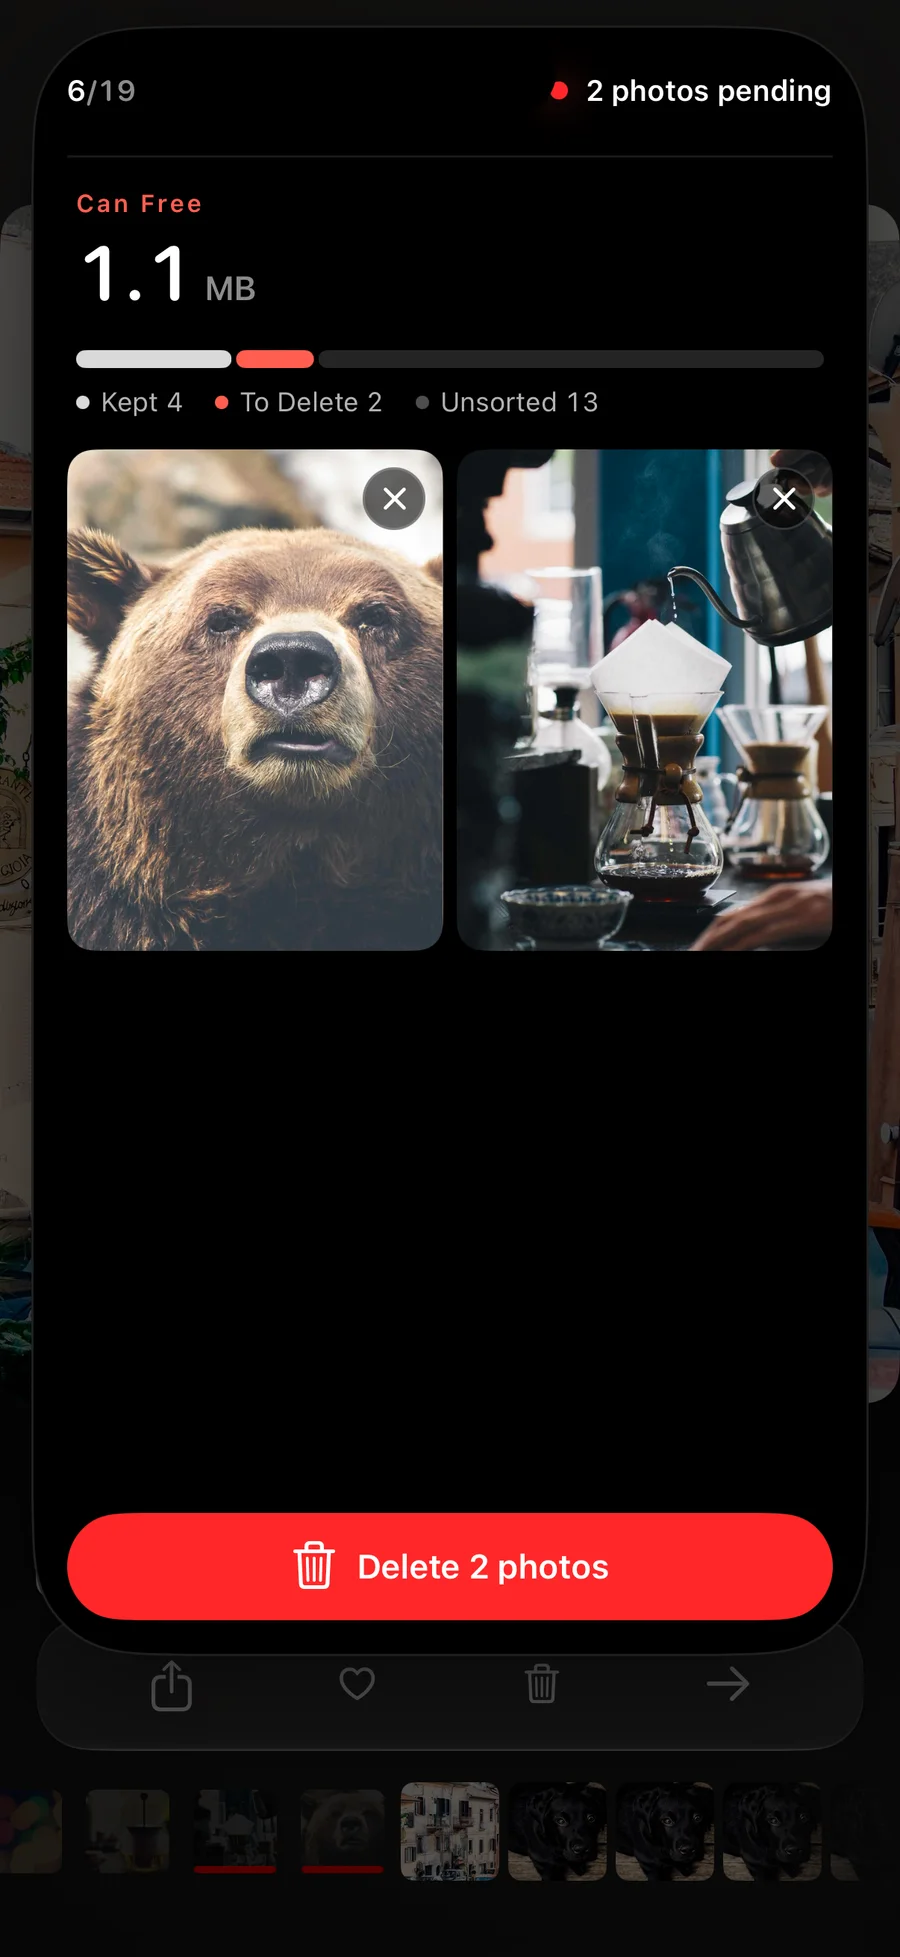
Removing one of these two photos from the list changes the delete count from two to one.
Where will I start next time?
Tap Close in the top-left corner. If photos are pending, choosing Leave keeps those photos in your library and clears the pending list. Open the same month again to return to the photo where you stopped. To deal with your selections before leaving, choose Delete First and review them before confirming.
Can I recover a photo after confirming?
Apple Photos keeps items in Recently Deleted for 30 days unless you permanently delete them sooner. With iCloud Photos on, a deletion also syncs to your other devices using iCloud Photos with the same Apple Account.
Apple Support: Delete and recover photos